This month, I’ve found myself in charge of an online fitness challenge group for some friends who want to start off the new year with some healthier habits. We’re not trying to set the world on fire, and my goal is to just increase my Ashtanga yoga practice from 2-3 days a week (I’ve really fallen off the wagon) to 4 days a week for the entire month. Many of the people involved in the group have expressed interest in starting a yoga practice of their own, and instead of writing an obnoxiously long Facebook post about it, I thought I’d just put my tips for practicing right here on my blog and share them for anyone who’s interested.
First, I’d like to start by saying that I have been practicing Ashtanga for only the last 9 months. I am NO expert! But I love the practice. I love the challenge. I love the consistency, and while I’m not yet up to the standard 6 day-a-week practice, I have been able to maintain my practice for nearly a year and more or less regularly. I’m a beginner, talking to other beginners, about how to begin.
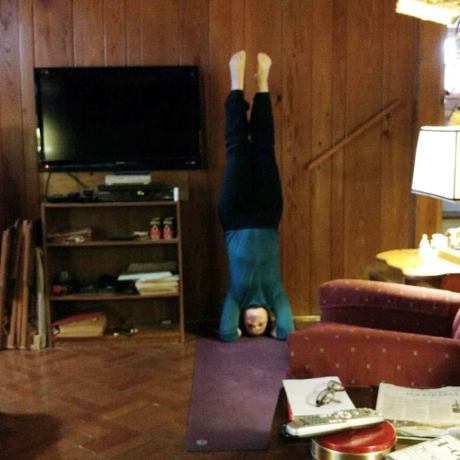
- Firstly, try to remember that yoga, really and truly, can be practiced anywhere. You don’t need a gym. You don’t need a studio. You don’t need equipment. (Though I do recommend a good yoga mat. A good one will provide grip, a little cushion, but will also be firm. I have a Manduka mat. They are expensive, but I don’t think you need to go all out for your first mat. You can find one at Target for less than $20 that will work just fine for a long time. And you don’t have to spend a bunch of money on a yoga towel if you feel yourself getting sweaty and slippery. I literally use an old hand towel to get my grip and mop myself up.) This last week, I did my practice at my Grandmother’s house. We had 9 people staying in her 1,000 square foot home, and I still found a 3-foot-by-6-foot space to plop down my mat and practice in my pajamas. My dad was sitting on the couch playing solitaire while I was practicing. It’s a little weird, but I felt an awesome sense of accomplishment because I had eliminated my excuses and completed something just for me.
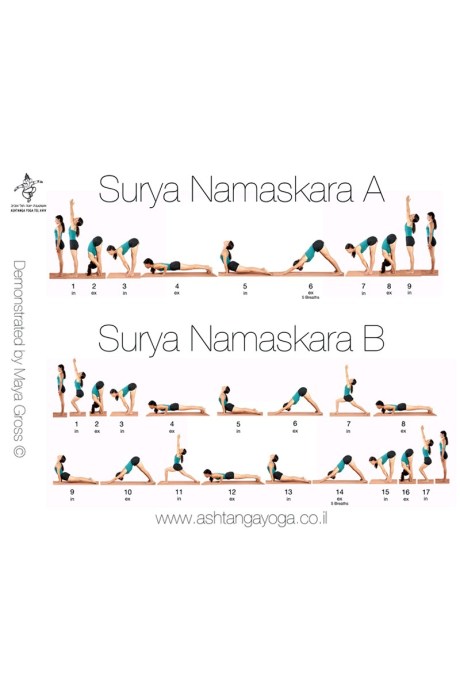
- Yoga doesn’t have to be complex, fancy, or fitspo. My instructor regularly tells me, “Surya is a practice.” Surya Namaskara A and B—better known as just Sun Salutations—are far more than just warm ups. They are a full practice in and of themselves. Once you learn them, you can complete an entire practice in about 15 minutes max. 10 Surya As, 5 Surya Bs, and you’ll feel more centered, more engaged, stronger, and more flexible. Often, when I’m pressed for time, instead of taking 75 minutes to complete my full practice, I’ll do my Suryas and a short closing sequence and be done in 20 minutes flat.
- Shorter and more frequent is better than longer and less consistent. I’d love to complete my full practice every day. Really, I would. But I have two small children. I’m a substitute teacher (so I’m “on call” early in the morning). I’m trying to get a small crafting business off the ground. I don’t always get the sleep I need. I don’t always have enough reserves of attention. Sometimes, I just flat out don’t wanna. Shorter, frequent practices are the next best thing to frequent, long practices. I’ll cut my Primary Series in half. I’ll switch from a long closing to a short closing. I’ll just do 15 Sun Salutations and call it a day. Don’t stress about how long your practice takes you. Just practice, and all will come!
- Variations are not cheating! Use the props if you need them. Bend your legs if your hamstrings are screaming. Don’t worry about touching the floor, or your toes, or your elbows. Your practice is yours. No one else can tell you how to do things “right” for your body.
- Remember the first two limbs. “Ashtanga” translates to “eight limbs.” They represent the lessons you are supposed to learn from a regular, consistent practice. The first two limbs are “non-violence” and “truthfulness.” Ashtanga limbs sound New Agey. Spiritual. Perhaps even a little silly. But when you think about them as part of a physical practice, we can think of the first two limbs as “self-care” and “self-awareness.” Think about “non-violence” as something that you can direct inward, towards yourself. Don’t get caught up in the idea that “pain is gain” or that yoga is “supposed” to hurt. It is not. If something hurts (and not in an “Oooh, I haven’t stretched that muscle in a really long time!” kind of way, but in a sudden, sharp “Ow! Owowowow! What the holy hell??” kind of way) then stop. Practice non-violence towards yourself, first and foremost, within your yoga practice. The outward stuff will come later. Also, think about “truthfulness” more as “self-awareness” in relation to your practice as well. Can’t get your heels on the ground in Downward Dog? Having problems fully extending your arms in Warrior 1? Or, alternately, feeling as though you could be doing more, reaching farther, not really pushing yourself as hard as you could? Recognize and accept where your body is, honestly. Assess yourself. Turn inward. Again, all of the outward stuff will come afterwards.
My two favorite sites for Ashtanga tips:
The Ashtanga Yoga Institute. Yes, it’s in German. But this site has all of the best infographics available for breaking down each pose, step-by-step, and showing you exactly when to breathe, or transition, or hold each asana. I prefer text and image over videos, so this site is my true go-to when I’m stuck.
Kino Yoga. Yes, she’s incredibly blonde and incredibly peppy. But, girlfriend knows her stuff! Whenever I get stuck on a transition, or a particularly difficult pose, I can always find a great, short video where she breaks it down and gives tips for accomplishing even the weirdest, pretzeliest of poses.
The fitness fun starts tomorrow! Let’s have a great month, friends!