The biggest question mark that remained, literally, hanging over our heads after we finally purchased our new Ikea kitchen cabinets was, What is behind the soffit? We bought 39” tall upper cabinets, and the crown molding that would bring them visually all the way up the ceiling. We had the doors, the frames, the plans for the under cabinet lighting. We were in it. That soffit had to come down.

But what was inside it?
For months, I had been doing research online, asking the Gods of Google to show me what was tucked inside that 12×12 box above my cabinets. It proved surprisingly unhelpful. I read stories that detailed everything from the comforting—“There was nothing but insulation in ours!”—to the terrifying—“We opened them up and realized that we would have to replumb the entire bathroom and kitchen, as well as change all HVAC in the downstairs. Our contractor took the ceiling down in three rooms.”—to the underwhelming—“We opened it up, saw that it was full of stuff, and just shrugged and closed it all back up again. It wasn’t worth it.” We knew that the master bathroom was directly above the kitchen, and I had nightmares about opening up the soffit, only to discover the down pipe for the toilet (what my uncle affectionately calls the “shitter stack”), winding its way through my kitchen, the horrors of its raw sewage mere inches and a thin PVC pipe away from my daughter’s fajitas.
It gave me more anxiety than anything else in the kitchen. I thought about it constantly. What is in the soffit? I begged Honest Husband to let me just drill a small hole in it, from the inside of one of the upper cabinets. Just a little exploratory hole, into which I could shine a flashlight. Just to see. Just to know what was in there. Just to prepare myself a little bit for whatever it was that we needed to do.
“What if we open it up, and there’s plumbing in there? Then, when we try to move the plumbing, rivers of poop spray all over my kitchen? That’ll never get clean! I’ll never feel clean again! Rivers of poop!”
Honest Husband, whose blood pressure is usually much more prone to dramatic spikes over home renovations, was surprisingly calm about the whole soffit situation. He shrugged, “Whatever is in there, whatever we find, we’ll move.”
“Rivers of poop!”
“Seriously, do you really think that we’re going to find something that is just impossible to move? Do you really think that wires, ductwork, and pipes can’t be moved? They’re not concrete. They were put in there. They can be put elsewhere.”
“Rivers of poop!”
“There will not be rivers of poop in your kitchen. I promise.”
“Rivers!”
No matter what I did, I could not excite his agitation. He made me wait, until Sunday, May 18th. The day before Memorial Day. My mother-in-law watched the girls for the night, and Honest Husband and I woke up revived, both having gotten a full eight hours’ sleep for the first time in months. We woke up, and he looked over at me.
“Wanna see what’s in that soffit?”

You give the guy one solid night’s sleep…
By noon, the upper cabinets and the soffit were almost entirely taken down, the girls were loving the noise and excitement, and I was breathing easier.
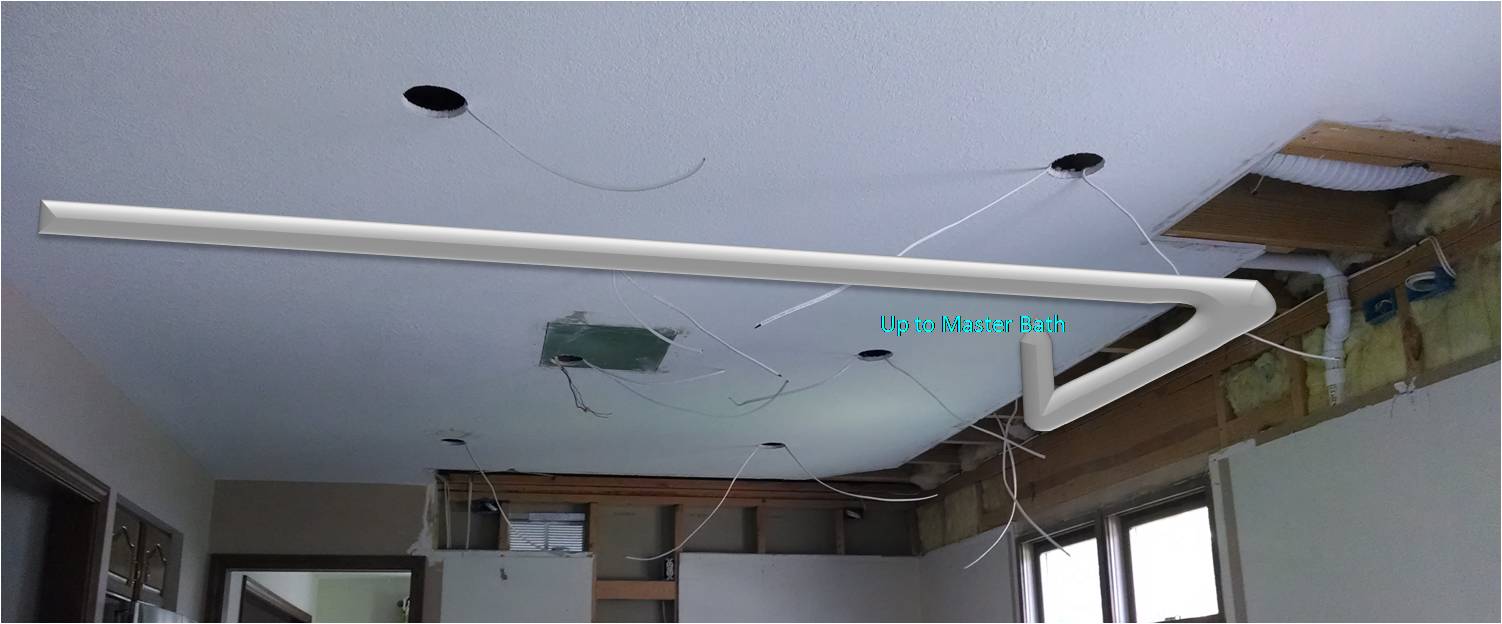
Not because the soffit was empty (because it wasn’t), but because I now knew what it was hiding all this time. I had a clear adversary:

From left to right: 1. House Wires, 2. Ducting for Vent Hood, 3. 4” Insulated Duct for Master Bathroom vent, 4. House Wire, 5. Overflow Pipe for Master Bathroom, 6. Phone Line.
And this is how we defeated the adversary.
1. House Wires, Stove Side: The stove side of the kitchen was a pretty easy fix. The wires were fit inside pre-existing slots along the headers, and a small notch in the drywall was made to accommodate them. Honest Husband was determined to fix everything according to code, so that our “DIY” project wouldn’t reek of amateurism. So no floor joists or headers were cut or moved in any way. The structure of the house was in no way compromised by any of his work. Mud and drywall tape covered up where the wires went seamlessly (we just had to make sure we marked where they were so that we didn’t accidentally run a screw into them while installing the upper cabinet to the left of the stove).
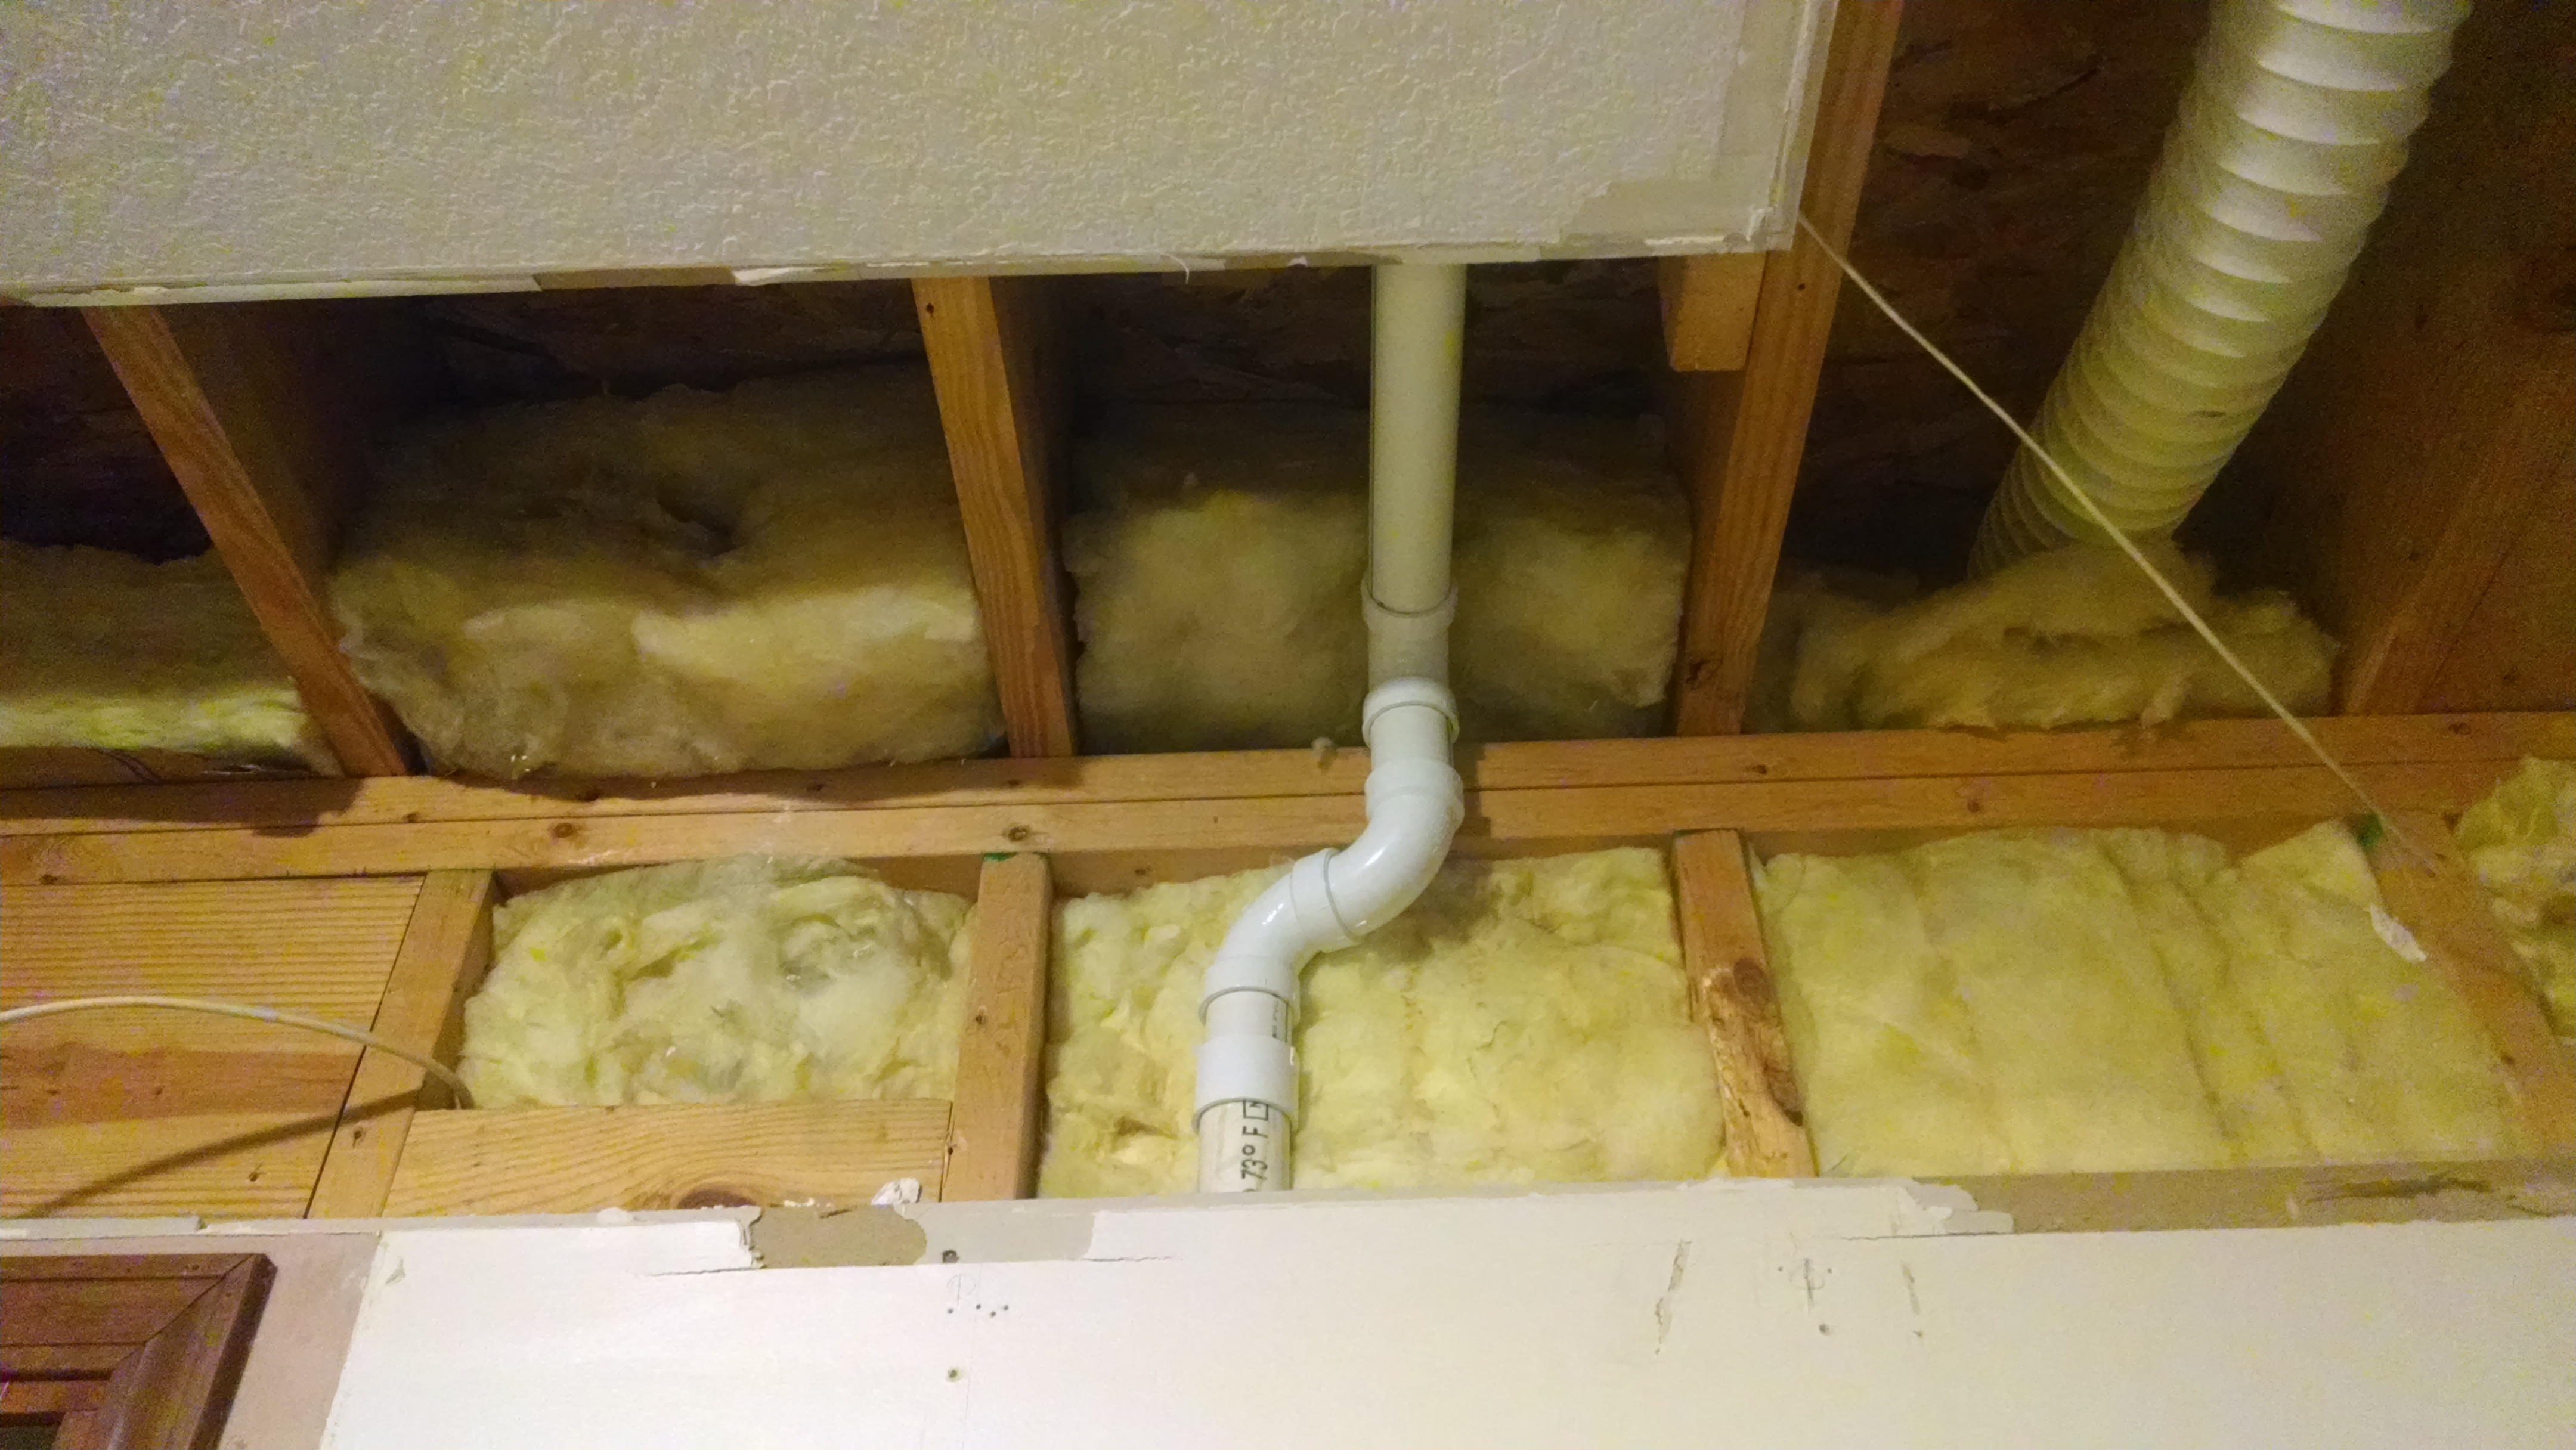
2. Ducting for Vent Hood: The vent hood didn’t require a fix at all. We were pleased to discover that it was already fitted between the upstairs floor joists and vented outside of the house on the second floor. Based on manufacturer’s recommendations, we did replace the flexible vent ductwork with solid ducting, but no structural changes had to take place. Easy peasy!
3. 4″ Insulated Duct: The ductwork for the upstairs bathroom appeared to be our biggest issue (it was a giant black snake, after all!), but even that ended up being fairly simple. The duct went all the way across the kitchen, laying on the ceiling drywall, before making a left turn in what was once the soffit and going up into the floor of the master bathroom, underneath the double vanity. It’s kind of hard to imagine, so I made a crappy illustration in PowerPoint to show you all what I mean:
The duct went across the ceiling, behind the drywall, then swept over and up into the master bathroom above.
To fix this, we simply cut the duct shorter, and routed it up through the floor of the master bath. The vent moved from being underneath our vanity to being behind the closet door.

Before. The vent came out underneath our double vanity in the bathroom.
After. The duct already ran between the floor joists just behind the bathroom closet. It was a pretty easy fix.
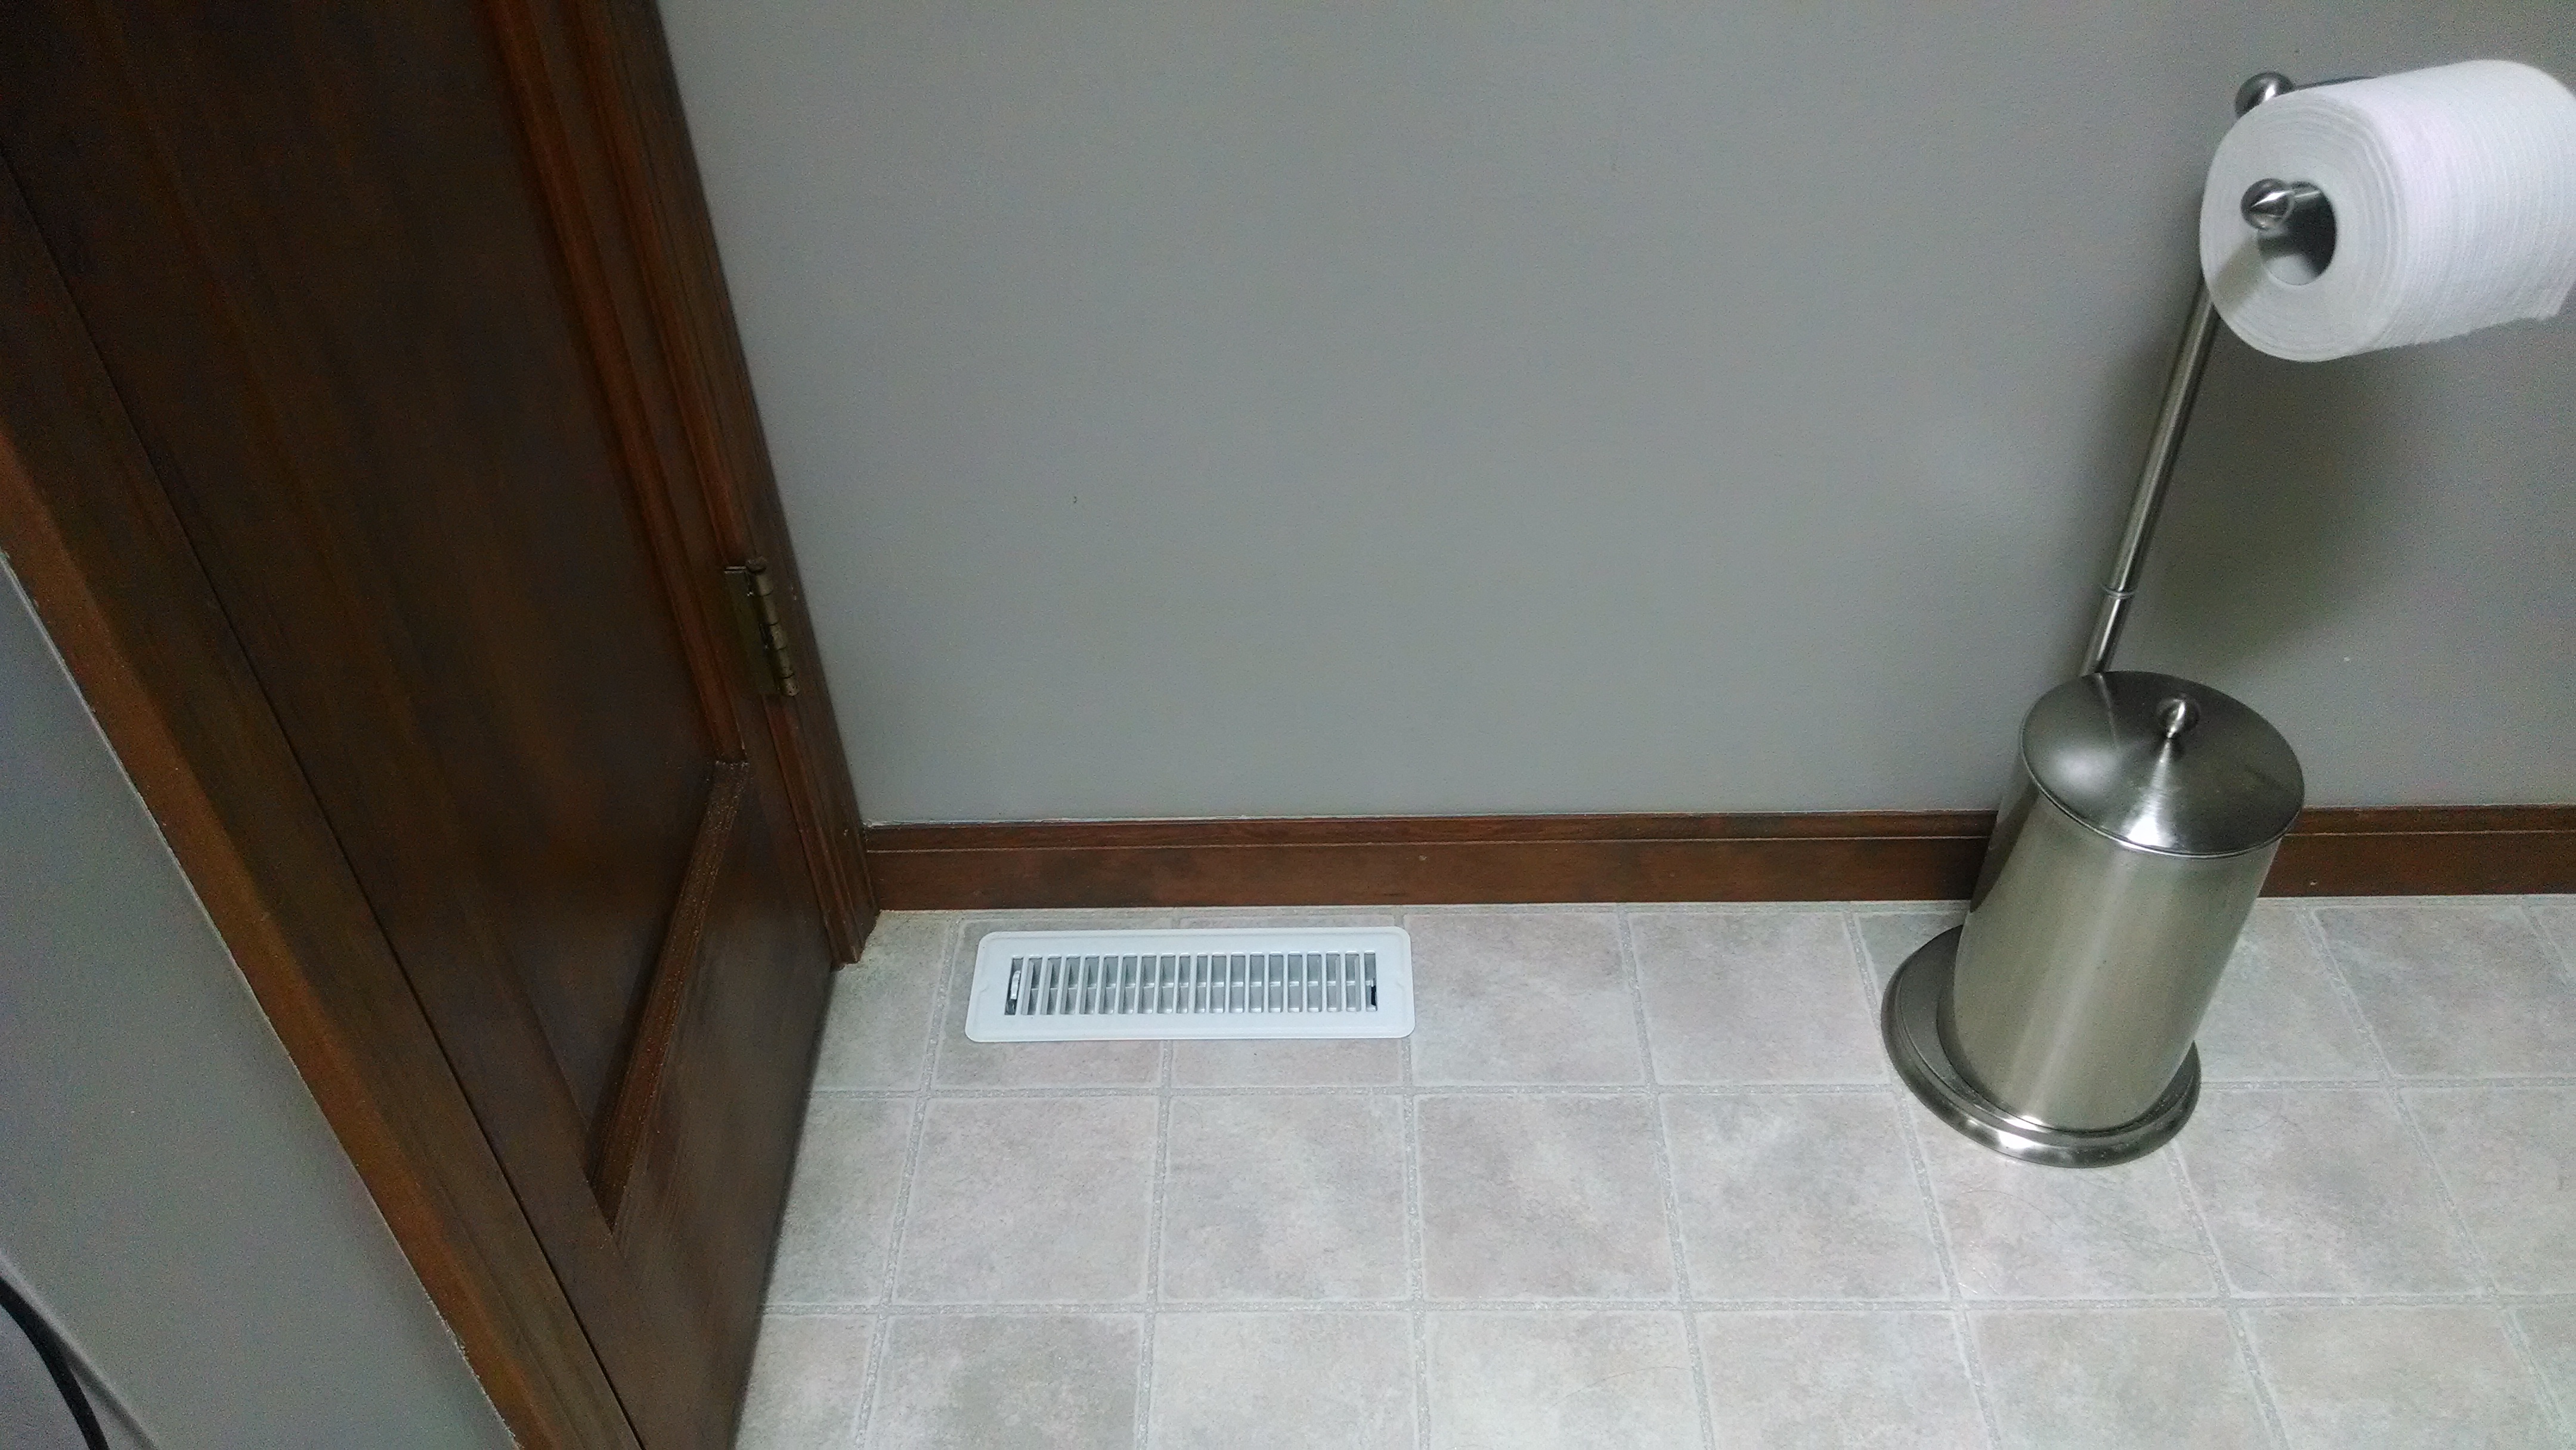
I’m actually very pleased with this change. The old vent blew hot and cold air on our feet, and spilled haphazardly into the bottom of the cabinet. This new one looks nicer, is easier to control, and doesn’t make my toes chilly after a shower! The new white vent looks nice, and I don’t mind seeing it in the bathroom. (It’s a bathroom, after all)
4. House Wires, Sink Side: The second wire actually went from the light switch next to the sink, to the single floodlight above the sink. We rerouted it, and will use it to control the under cabinet lighting. It now goes from the switch next to the sink to a junction box that is hidden behind the large upper cabinet.
6. Phone Line: The phone line was disconnected and placed in the ceiling. If someone in the future really has a craving for a landline, they can access it through there. (I have to admit, it was a little thrilling/nerve wracking seeing our one phone line cut and removed. It felt taboo. Almost wrong. It always seemed like a necessity growing up, such a sign of home. And we cut it out, making jokes that a future homeowner is going to find it and have no idea what the hell it is!)
5. Overflow Pipe for Master Bathroom: Ahhh, the pipe. It was my worst fear: the gateway to the River of Poop. It came down from the master bathroom, twisted out around the headers holding up the second floor, and went down into the crawl space. It was definitely not what I wanted to see.

The “Shitter Stack.”
It came from the bathroom. The toilet, no less. It jutted out into what was going to be my new upper cabinets. If we wanted to move it completely out of the way, we’d have to replumb the whole bathroom, rip out a bunch more of the ceiling, or even try to adjust the second floor header, which would be major money, and would probably require an engineer, architect, and permits.
Luckily, though, Honest Husband is a bit of a Houdini. But, like Houdini, he wasn’t going to need real magic. Just cleverness. Instead of making the pipe disappear, he was going to create the illusion that it was, in fact, gone. Trick the eye. Employ some sleight of hand. He decided to slightly adjust the pipe so that it pressed against the header, keeping it as close to the wall as possible.
Instead of a hard 90* turn, Honest Husband made the pipe follow the curve of the structure beneath it.
Then, he cut out a hole in the back of the cabinet to accommodate the plumbing as well as the electrical boxes needed for the under cabinet lighting.
He notched out the back to make room for the pipe.

And cut a wide hole to have access to the electrical.

This is a 36″ wide cabinet. The hole is about two feet.
Finally, he installed the junction boxes and transformer for the under cabinet lighting next to the pipe, and patched up the drywall around it.

After drywall.
After that was all done, he took a scrap piece of melamine shelf, cut it down, and made a false back on the upper cabinet that was screwed into place and could be removed after the cabinet was installed.

The false-back shelf.
This false back could be removed to have access to the electrical components in the kitchen, is virtually invisible once the cabinets were installed, and only eats up about 1 inch of shelf depth on the upper cabinet.

The pipe, junction boxes, wiring, and transformer for the LED under cabinet lighting inside the cabinet.
The view from below.
Oh, and the Rivers of Poop? Turns out I didn’t have to worry about it at all. We cut into the pipe, and found that it was perfectly clean inside. It was just a vent pipe. Insurance for any flooding or backups we may experience. It had never been used, so far as we could tell.
So, there you have it. Everything that was in our soffit, and how we dealt with it. I’m not saying that the rest of the kitchen has been easy to deal with, or that it hasn’t been stressful (YOU try having no appliances or floor for ten whole days and see how well-adjusted you are by the end!), but if there’s one thing that taking the soffit down has taught me is that Honest Husband and I can tackle anything together. Nothing is impossible. And, even if we have to make some adjustments along the way, odds are good that we can make some magic happen.
Or at least chuckle at the illusion.
